
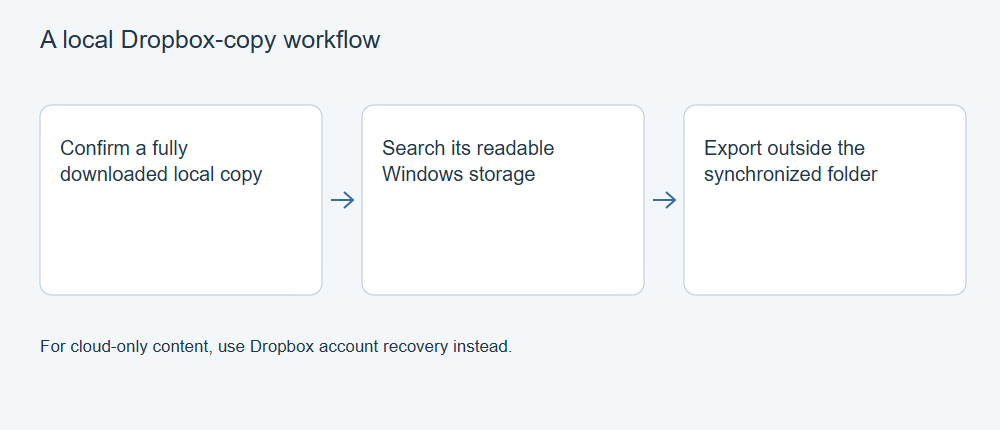
If a fully downloaded Dropbox file was deleted from your Windows computer, XRecovery can scan the readable local storage for remaining data. First check whether a usable copy still exists in Dropbox or on another device. For an online-only file or a missing account item, follow Dropbox’s own recovery options.
Choose this page for the local-copy task
This page focuses on a Dropbox file that was fully downloaded to Windows and later lost locally. If the item is missing from the Dropbox account, start with the Dropbox account recovery guide. For general local scanning and export, use the XRecovery Windows workflow. If the file was online-only, check the account and other actual copies before treating the Windows drive as a source.
Find where the file was stored
Identify the Dropbox account, owner, path and required version. Search the account and shared folders before deciding that the item was deleted. For managed or shared content, ask the authorized administrator or owner whether access changed.
Check whether the affected computer actually downloaded a full copy. A filename, icon or preview does not establish that the original file was present. If another device or backup contains a complete usable copy, preserve it before attempting a new recovery route.
Use local recovery only for a local source
If a complete downloaded file was later deleted from readable local storage, reduce unnecessary writes to that device and prepare another output destination. Use XRecovery’s Windows file-recovery workflow for the disk or partition that held the local file. For Dropbox account content, continue through the service’s native recovery controls.
Browse the local scan results by original path or file type, then use search and filters to narrow the selection. Preview supported files and save the required content to another location; open those exports to check them. Ordinary scanning and supported original-file preview are free. Recovery and repair share a cumulative 2 GB free allowance, so check your remaining balance before starting the save or repair task.
Show only lost files when you need deleted content, and use advanced filtering to hide temporary files or browser cache from the results. Send a damaged document or media file to the repair queue when its format is supported, then save the required results to a separate drive.
Validate and preserve the required version
Open the returned file in the intended application and inspect its actual content. For a project, include required assets; for media, check the complete relevant material. Keep the initial export outside the synchronized folder before editing or repair. Check its contents before uploading it back to that folder.
Record which source and route supplied the result. If the cloud item is unavailable and no full local or backup copy existed, keep that limitation explicit. Neither a placeholder nor a generic cloud feature label is a substitute for the missing file bytes.