If Windows will not start, you can create an XRecovery rescue USB on a working computer and use it to run XRecovery on the affected PC. From the rescue environment, choose the readable source disk, scan it, preview the files you need and save them to a separate destination.
This guide covers the XRecovery 4.0 rescue workflow. Check the download page for the installer currently available. Labels and screenshots can vary by build.
Before you start
- A working Windows 10 or Windows 11 computer with XRecovery installed.
- An internet connection on the working computer. XRecovery downloads the required rescue components when they are first needed.
- A USB flash drive that meets the space requirement shown by XRecovery. Back up its contents first: creating the rescue drive changes the selected USB and can erase its existing data.
- A healthy, separate destination device with enough free space for the files you want to save. Do not use the affected source disk as the recovery destination.
If a source uses BitLocker or other encryption, keep the valid recovery key or password available. Do not include it in support screenshots or messages.
1. Create the rescue USB on the working computer
- Connect the USB flash drive to the working computer and open XRecovery.
- Open Crashed PC Rescue and proceed to the bootable-drive creation screen.
- Select the intended USB drive. Check its name and capacity carefully before continuing.
- Start creation and confirm the USB data warning only after you have backed up that drive. Allow the required components to download and keep the USB connected while XRecovery prepares and checks it.
- Wait for the creation-success screen. Safely eject the USB, then take it to the computer that needs rescue.
If creation fails, keep the error message and use the page’s Contact Support option. A failed or incomplete creation is not ready for use as a rescue drive.
2. Start the affected PC from the rescue USB
- Shut down the affected PC and insert the rescue USB.
- Turn it on and open its one-time boot menu using the key specified by the computer manufacturer. For example, Dell documents F12 for its one-time boot menu; other models can use a different key.
- Select the USB device’s boot entry. On a UEFI computer, this can be shown as UEFI: [USB device name]. Follow the instructions for the machine’s firmware and the rescue media.
- Allow Windows PE to initialize. When XRecovery opens, continue with source selection below.
Use the manufacturer’s instructions if the USB is not listed. Microsoft’s UEFI and legacy BIOS boot guidance explains the different boot entries; Dell’s firmware and one-time boot-menu guide covers Dell models.
Do not format the affected disk or reset Windows to make it appear. If the machine reports a boot or security error, record the exact message and check the model-specific instructions before changing firmware settings.
3. Choose the disk containing the files
In the rescue environment, open Hardware Disk. Identify the source using its label, capacity and disk information, then select Search for Lost Data. Drive letters can differ from those shown in normal Windows, so do not identify the source by its letter alone.
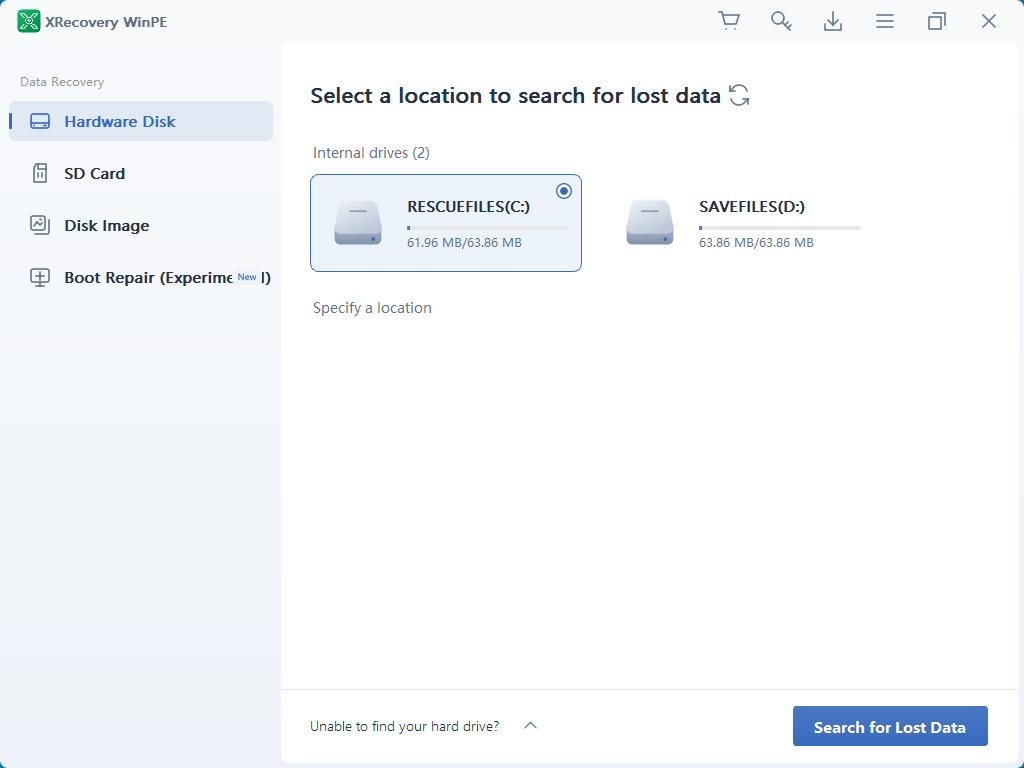
The screenshots in this guide use dedicated sample disks. Your disk names, capacities and results will differ.
If the source does not appear, open Unable to find your hard drive? for the available detection guidance. Stop if the device repeatedly disconnects, reports an unexpected capacity or shows signs of physical failure.
4. Review the scan and preview files
Keep the source connected while the scan runs.
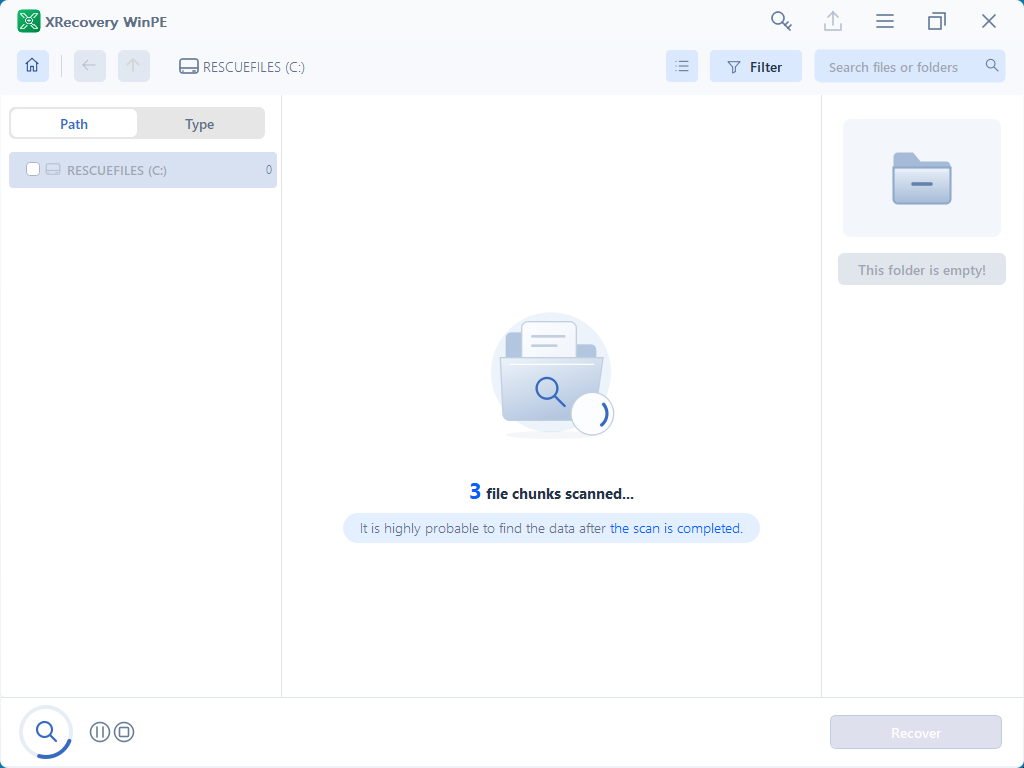
Browse the results, use search or filters to locate relevant files, and open supported files in preview to inspect their contents before choosing what to recover.
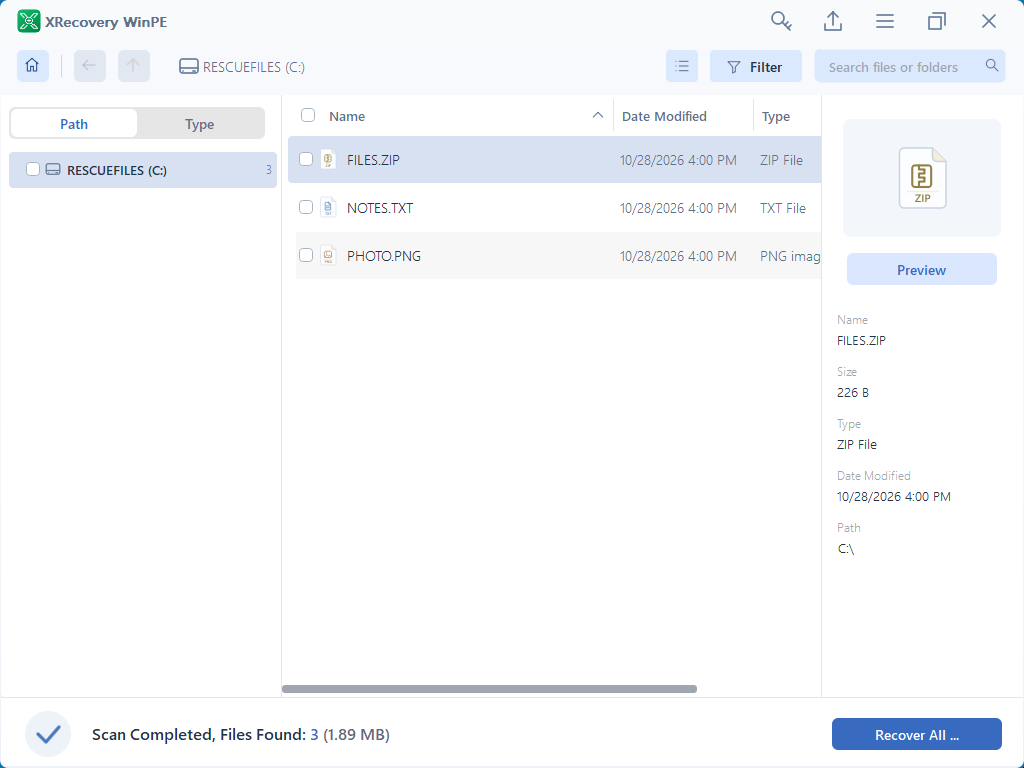
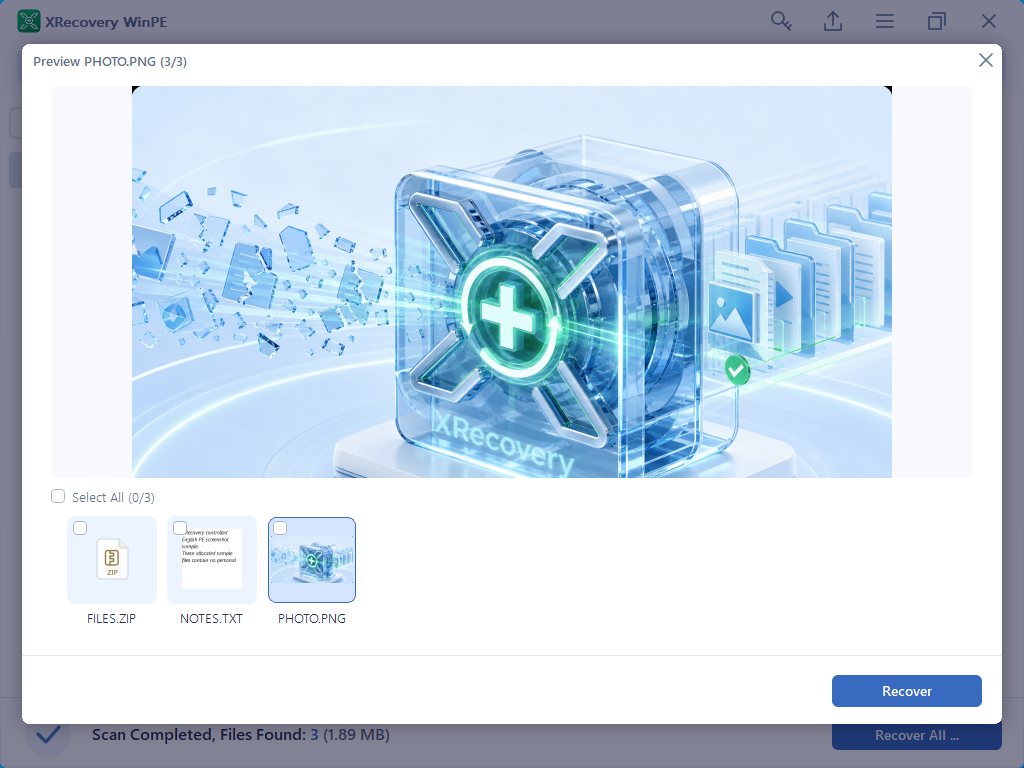
A file name or thumbnail alone does not establish that a complete file is recoverable. Check representative documents, photos or other files where preview is available.
5. Save to a separate destination and check the output
Select the files you need and choose Recover. In the destination dialog, select a healthy device separate from the source and confirm the destination. Another partition on the affected physical disk is not a separate device. Do not use the temporary PE Boot (X:) drive as a permanent destination.
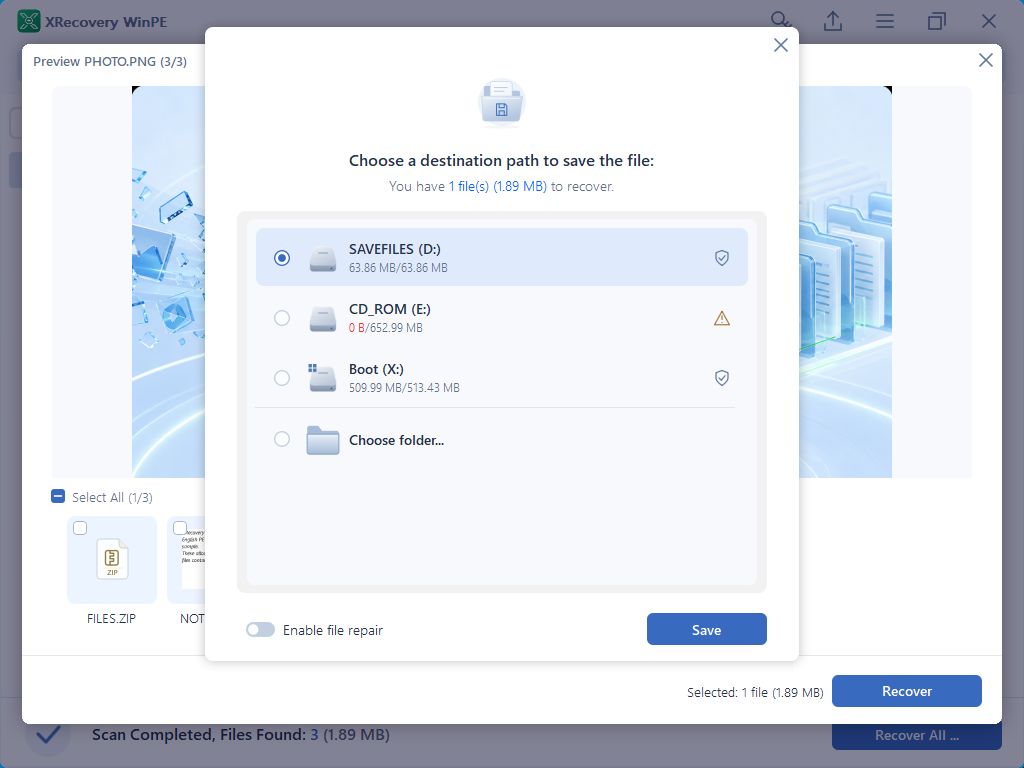
After export, open the recovered files in their normal applications. Check the contents you need, not just the completion percentage. Keep the source unchanged until the required files have been checked and backed up.
Questions about starting and using the rescue environment
Do I need to run Boot Repair before recovering files?
No. For file rescue, use the disk-scanning and recovery workflow above. Boot Repair is a separate operation; this guide does not instruct you to change Windows boot files or configuration.
The screen stays black or XRecovery does not open. What should I collect?
Note the computer model, the selected boot entry, any visible error and whether the screen loses its signal. A photo or short recording of the boot sequence can help support distinguish the stage that failed. Do not treat USB creation success as proof that the affected computer has successfully booted.
Can the rescue USB recover overwritten files or repair physical damage?
The rescue environment lets you work outside the installed Windows system. It still needs a source it can read; it cannot restore data that has already been overwritten or make physically unreadable storage readable.
Where can I get help with the next step?
See the general XRecovery recovery workflow for result review and output checks, or contact XRecovery support with the failed step and exact error message.