Detailed Tutorial
XRecovery 다운로드 and run xrecovery_install.exe to begin installation. Do not install it on the partition where data loss occurred (e.g., if recovering files from D:, install XRecovery on C:). you will see install Dialog like this: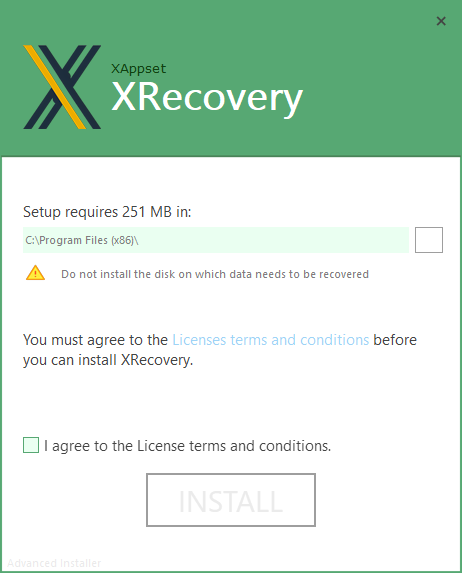 Read the End User License Agreement (EULA), accept the terms, and wait for installation to complete.
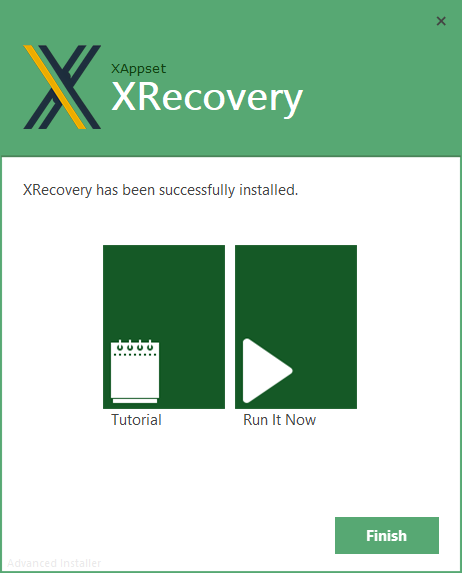
When you see this installation interface, it means your installation is successful. Click “Run It Now” to launch XRecovery. Internet access is required.
After successfully starting XRecovery, you will see the main interface as follows:
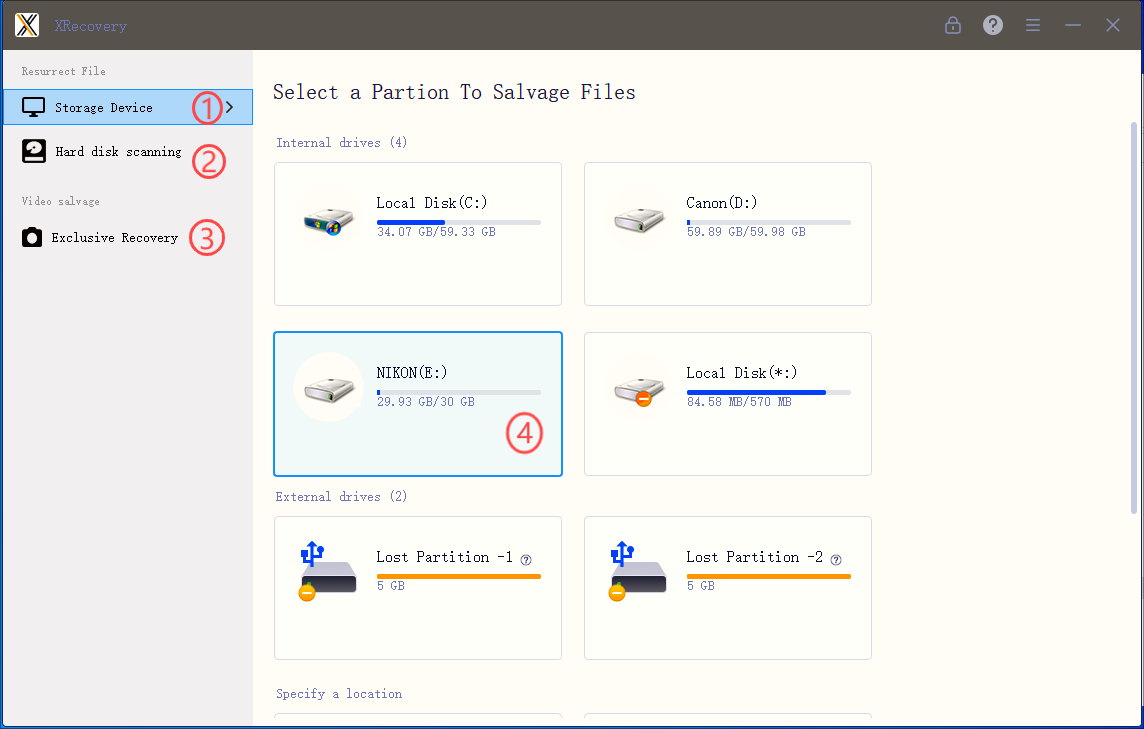
1、The left area
The left panel displays all available storage devices and partitions for scanning.
① A list of all partitions on your computer, including lost partitions—similar to what you see via Win + E.
② All physical storage devices (each may contain multiple partitions)
③ Proprietary algorithms enhance recovery of videos and images from camera memory
2、The right area
After clicking the button on the left, the right area will display detailed information under the corresponding button, such as partitions, storage device list, external storage, etc.
Double-click the large icon on the right to start scanning. The scanning interface is as follows:
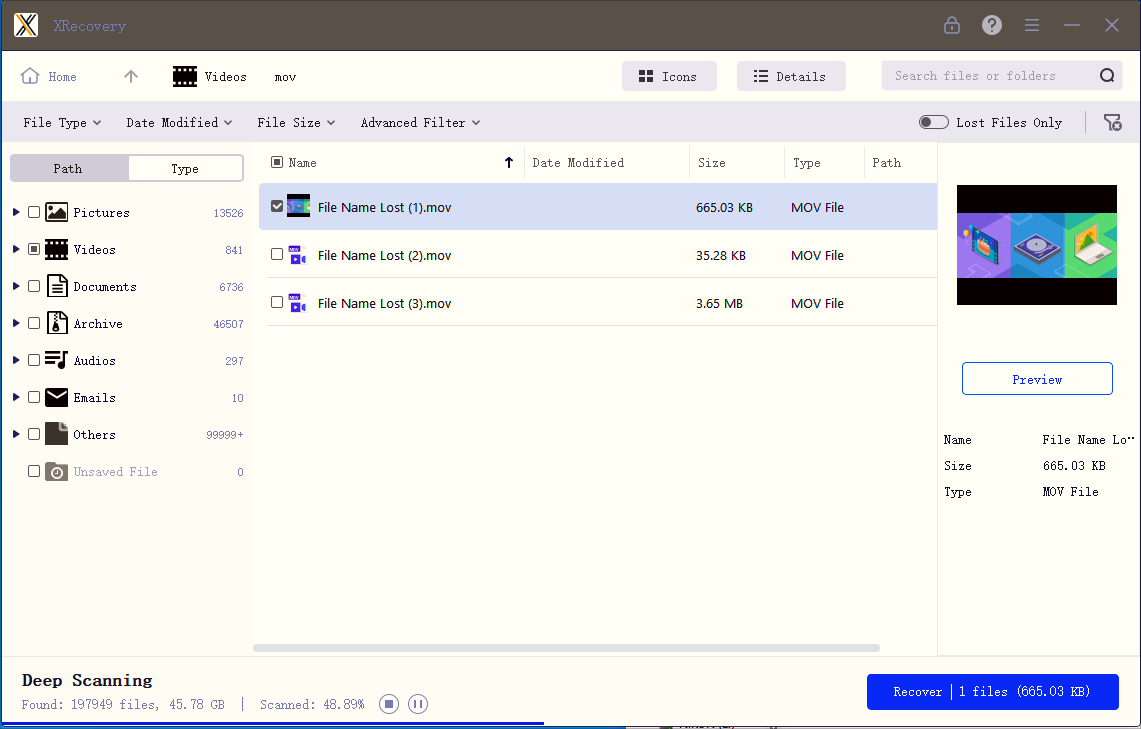
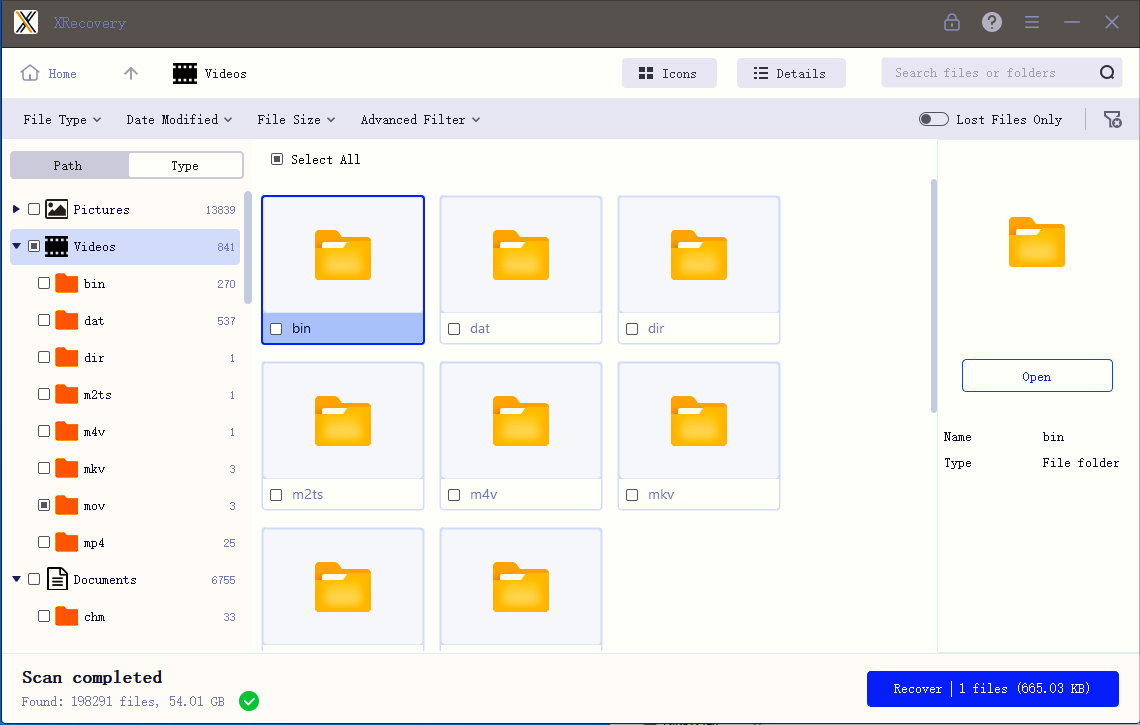
The following areas of the scanning interface are very important:
1. Choose how recovered files are displayed (tree view or file type) in the left panel
2. Display the specific recoverable files in the form of large icons or lists on the right
3. The top area can sort/filter/query the recovery results
4. The bottom area shows the progress of the scan
Wait for the scan to complete:
Select the file you want to recover and click the recovery button to recover the selected file to the specified location. Do not save recovered files to the same disk where data loss occurred—this may cause further damage.